Section 2: Deployment and Provisioning
2.1 Subscribe to the FortiGate BYOL AMI
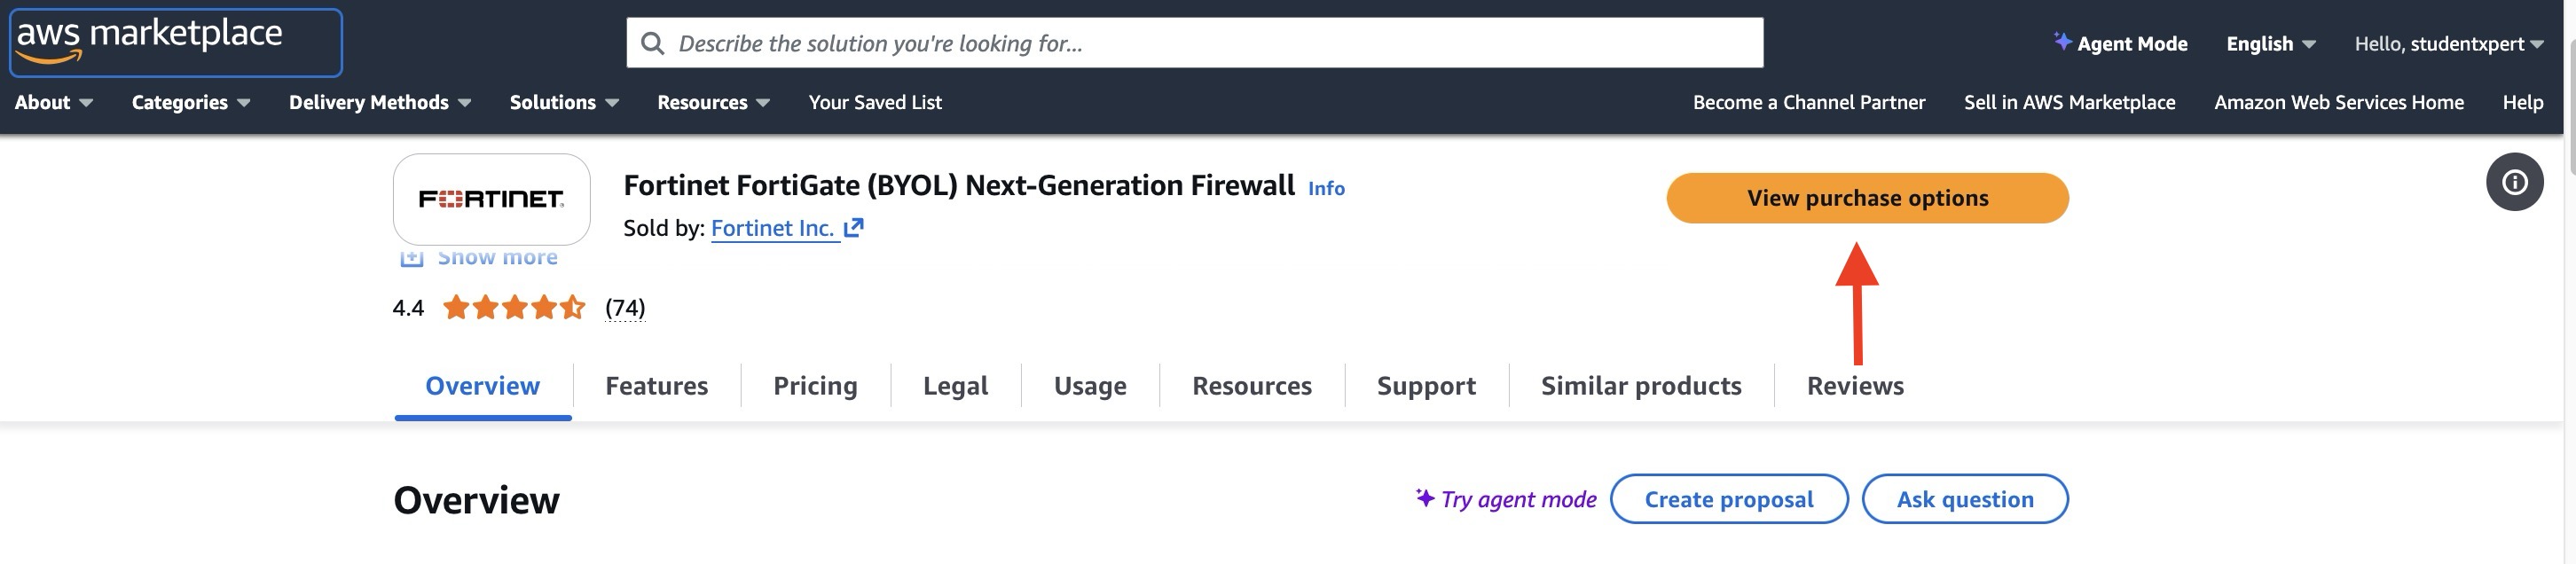
Before deploying the CloudFormation stack, subscribe to the FortiGate BYOL AMI in AWS Marketplace.
Open the FortiGate BYOL Marketplace listing.
Select View purchase options.
Select Subscribe at the bottom of the page.
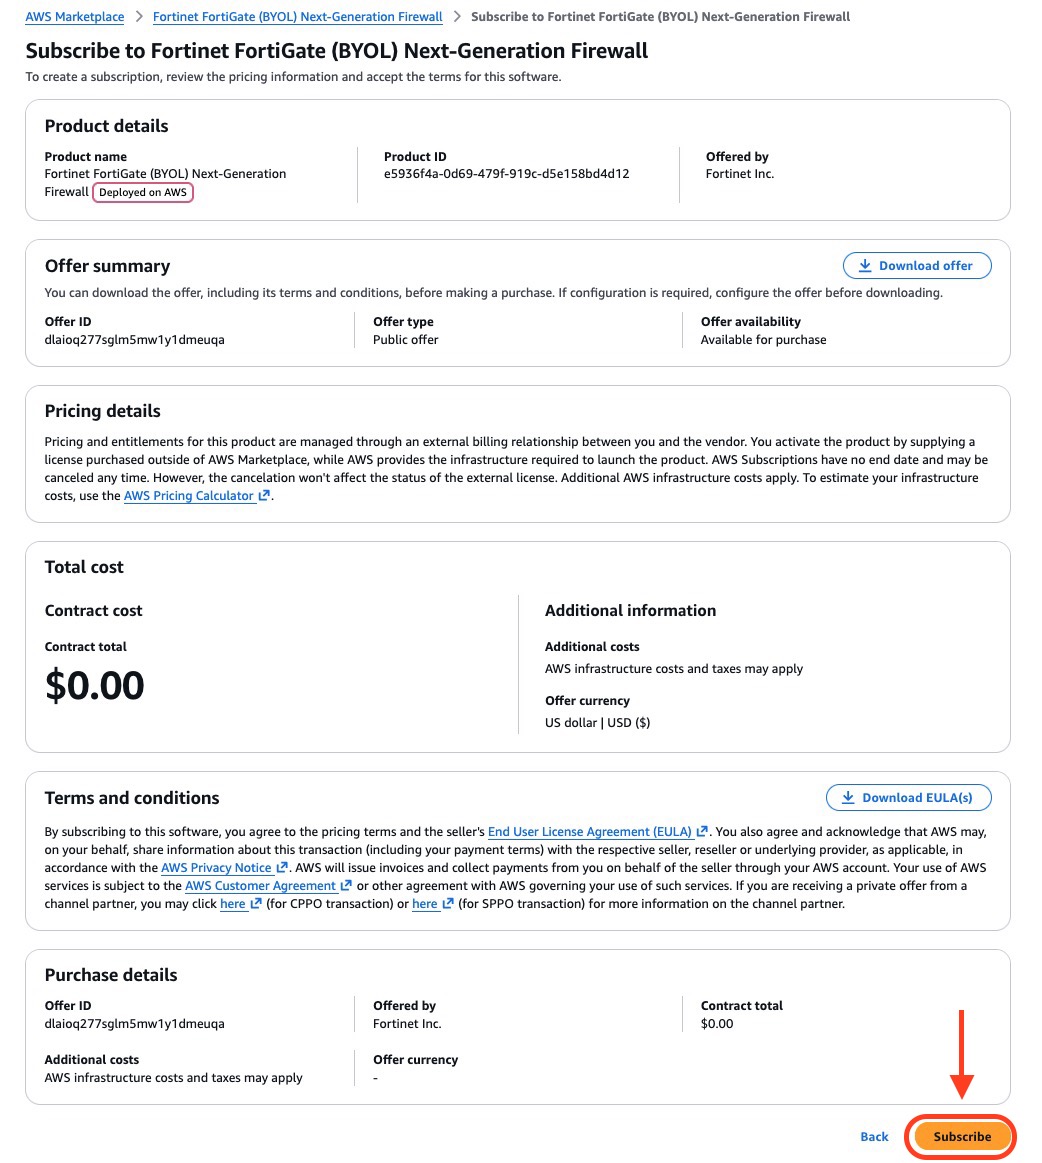
The Subscribe button may remain unavailable for several minutes while AWS processes the request.

Wait until AWS confirms that the subscription is complete.

2.2 Deploy the Lab Environment
Log in to the AWS Management Console.
Launch the CloudFormation template provided for the workshop.
The original guide uses a one-click Launch Stack button. Add the exact CloudFormation template URL to this page when available.
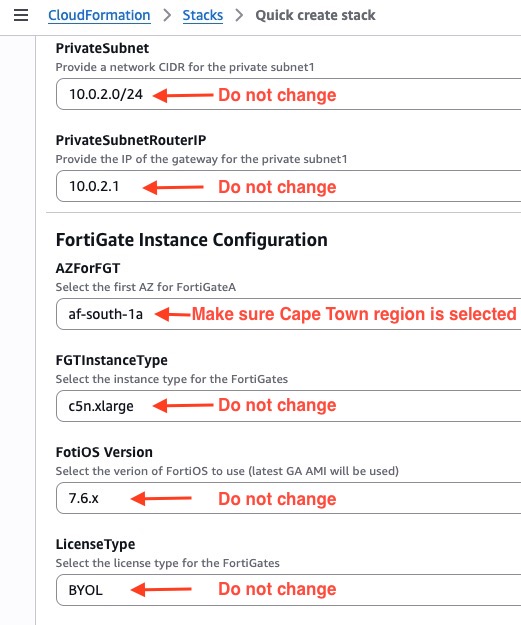
Confirm that the AWS Cape Town Region is selected:
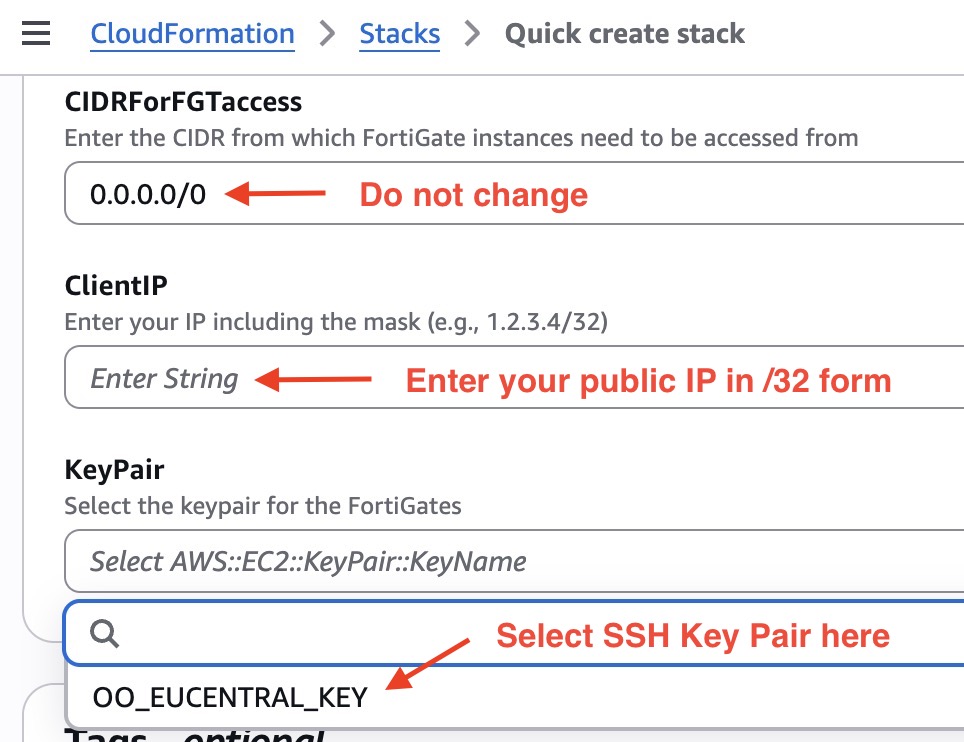
textaf-south-1Configure the stack parameters:
Parameter Value Stack name Your student ID, for example Student01KeyPair The SSH key created in Section 1.2 ClientIP Your public IP address in CIDR format, for example 203.0.113.10/32LicenseType BYOLTIP
You can use a public IP lookup service to identify your current public IP address. Append
/32so that only your current IP address is allowed.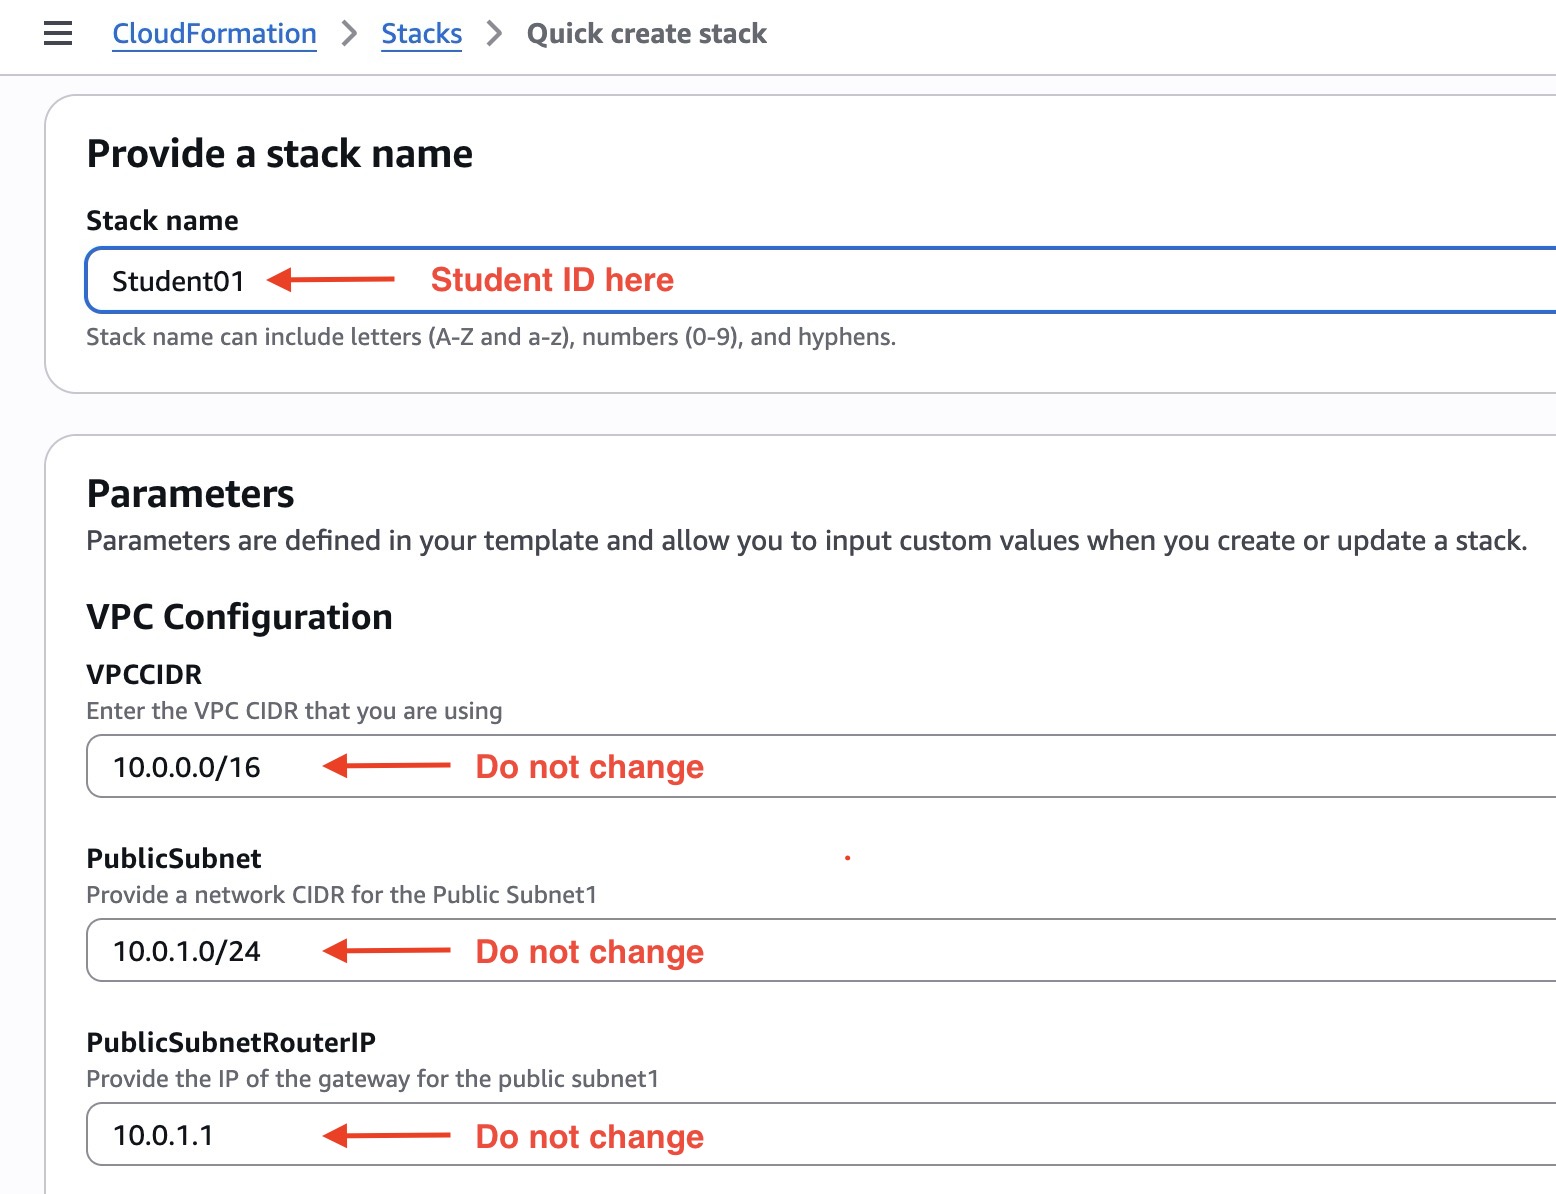

Select Next through the remaining CloudFormation pages.
Review the configuration and select Create stack.
2.3 Access the Deployed Resources
Wait until the CloudFormation stack status changes to:
CREATE_COMPLETE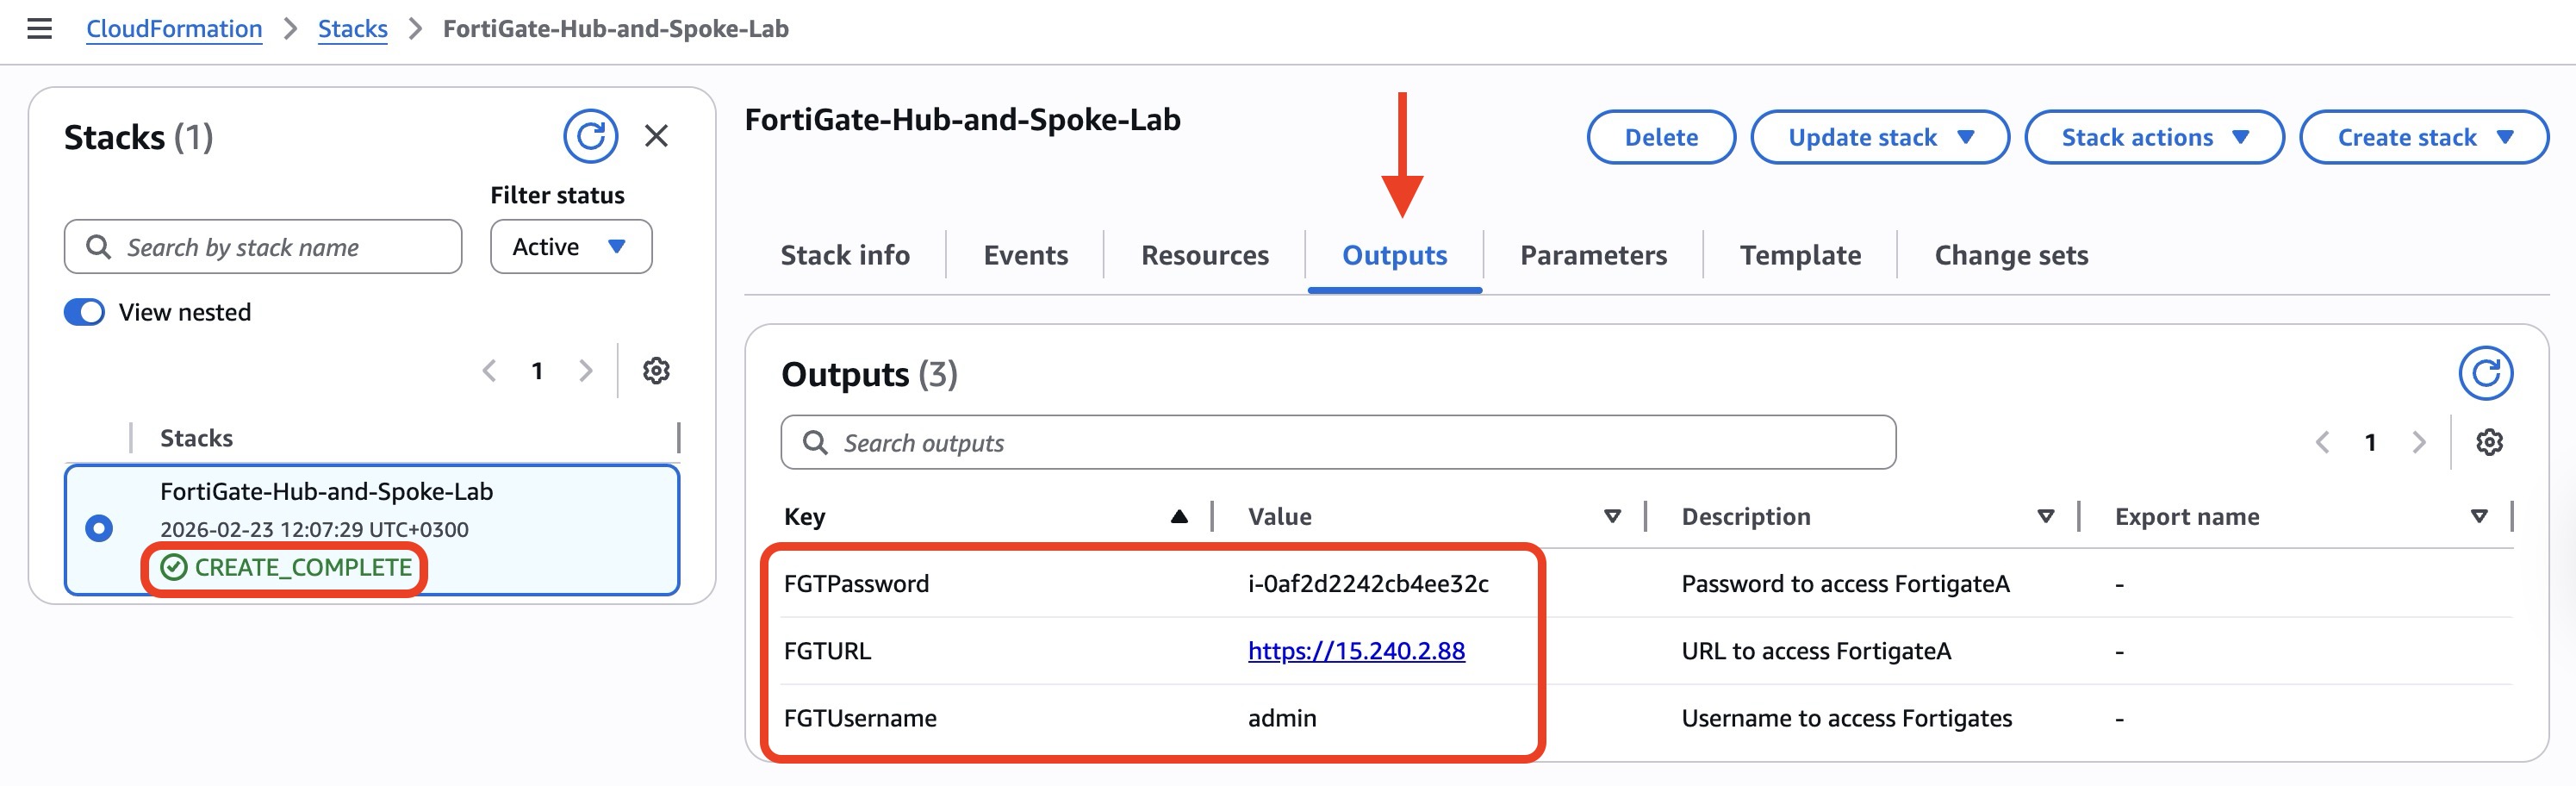
Open the Amazon EC2 console and locate the FortiGate instance.
Use the following initial credentials:
| Field | Value |
|---|---|
| Username | admin |
| Initial password | FortiGate EC2 instance ID |
Example instance ID:
i-0a1b2c3d4e5f6g7h8WARNING
The FortiGate GUI may take several minutes to become available after the CloudFormation stack reaches CREATE_COMPLETE.
Next Step
Continue to Section 3: FortiGate Preparation.